Smart Steps to Choose and Manage a Window Tinting Project for Your Vehicle
Starting a window tinting project benefits from a clear plan that frames your goals, budget, and schedule. Begin by defining what matters most: glare reduction, privacy, heat control, or style. Assess how your daily driving patterns affect those priorities. City commuting may favor heat rejection and UV protection, while weekend trips may prioritize comfort and aesthetics. Align expectations early to avoid rework and to keep the install day efficient and predictable.
Meanwhile, understanding film categories will guide better choices. Dyed films typically manage glare and privacy at a lower cost, while carbon and ceramic options enhance thermal performance without heavily darkening the glass. Verify that the chosen film type balances looks with functionality. Ask how the film handles infrared and UV exposure over time, and validate that warranties address color stability, peeling, and adhesive performance under typical climate conditions.
Next, check local regulations before committing to a shade. Laws vary by window and vehicle class, and compliance protects you from unwanted stops or fines. Document the legal visible light transmission limits you must meet, then compare those thresholds against your desired look. In practice, selecting a slightly lighter shade than your first instinct often delivers legal assurance while still improving comfort, especially for daily drivers and family vehicles.
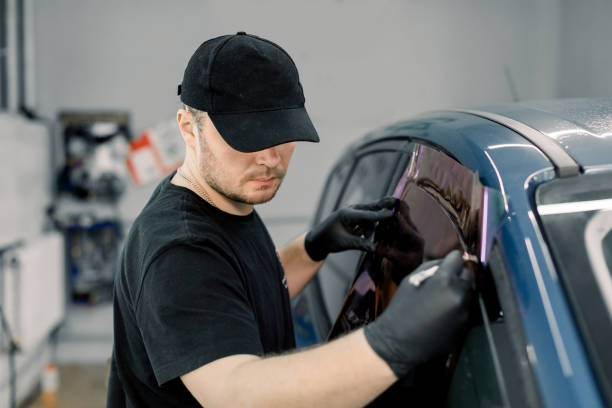
Beyond that, scope the installation workflow with your shop. A solid process covers glass preparation, film cutting, edge finishing, and curing guidance. Inspect how technicians handle gasket areas and third brake lights, and ask about techniques to manage dot matrix borders. A well-staged bay reduces dust and moisture that can mar the finish. Request timing estimates and plan transportation, since fresh film needs a calm ride home and careful window use for a short period.
Often, your budget works best when itemized by film tier, number of windows, and add-ons like sun strips. Calibrate expectations by weighing long-term value against upfront cost. Entry films may look good immediately but can age faster under strong sunlight. Premium films tend to maintain clarity and performance longer, lowering lifecycle costs. Buffer a modest contingency for unforeseen adjustments, such as replacing a compromised gasket or addressing preexisting glass issues.
Then, evaluate quality indicators you can see and feel. Inspect sample swatches against your vehicle in daylight to judge color tone and reflectivity. Validate that edges are clean and consistent, seams are minimized, and defroster lines remain unobstructed. On delivery, stage a quick walkaround and look from multiple angles. Small installation moisture pockets are normal and should dissipate; however, persistent haze or debris specks warrant follow-up to refine the finish.
However, seasonal timing can influence outcomes and aftercare. Warmer months often speed curing, while cooler or humid periods may extend it. Plan your schedule to avoid heavy rain or long highway trips immediately after installation. Maintain patience with first-week care: avoid rolling windows down, keep interior cleaners away from edges, and do not attach suction accessories. Good habits in this phase protect adhesion and help the film settle uniformly.
Meanwhile, aftercare over the long haul is straightforward but specific. Use ammonia-free cleaners, soft microfiber towels, and gentle strokes to preserve clarity. Avoid sharp objects near edges, and inspect high-touch spots regularly. If you add accessories like shades or mounts, verify they do not rub the film. Small checks every oil-change interval can catch lifting corners early, allowing a quick remedy that extends durability and preserves aesthetics.
Finally, consider adjacent upgrades that complement tint without overcomplicating the project. Paint protection films shield vulnerable panels from chips, and ceramic coatings simplify washing while enhancing gloss. Sequence these services thoughtfully: protect paint first, then tint, then apply coatings as recommended. When you phase the work with curing in mind, each layer performs as intended and you avoid unnecessary handling that could compromise newly applied materials.
Ultimately, selecting the right partner and film comes down to clarity, verification, and follow-through. Ask to view prior work, confirm certifications, and review care documentation. Choose a package that aligns with how you drive and how long you plan to keep the vehicle. For many owners, Automotive Window Tint provides a balanced improvement in comfort and privacy, and when managed with a methodical plan, it delivers reliable, lasting results.